John Hornick — Chef’s Apprentice
Sake is Japan’s unique beverage, sometimes incorrectly called rice wine—an ancient drink that’s rich with history and craft. Behind every bottle, there’s a long process filled with skill, patience, and tradition. Making sake isn’t just about mixing ingredients; it’s an art form that combines old techniques with new technology. This guide breaks down each step of sake brewing, showing you how this treasured beverage comes to life.
Understanding Sake: The Basics and Types
Sake is a fermented rice beverage. Unlike wine or beer, it uses rice starches instead of sugars as its starting point. The flavor, aroma, and quality of sake greatly depend on how the rice is polished and processed.
There are different types of sake:
- Junmai: Made purely from rice, water, yeast, and koji mold, no extra alcohol added.
- Ginjo and Daiginjo: Crafted with highly polished rice, with brewer’s alcohol added.
- Junmai Ginjo and Junmai Daiginjo: Made with highly polished rice, with no alcohol added.
A key factor that separates these types is how much the rice has been polished—removing the outer layers to create a cleaner, more delicate taste. Ginjo sake has 40-49% of the rice grain milled away (51% to 60% remains). Daiginjo has 50% or more of the rice grain milled away, with 50% or less remaining.
Learn more about sake terms.
My videos on How Sake is Made and Daimon: True Hand-crafted Sake, Part 1 and Part 2, where I was an intern.
To book your trip to Japan, or anywhere, use this Expedia box:
Experience Sake Breweries Near Kyoto
Maybe you’re heading to Japan and would like to see — first hand — how sake is made.

Maybe you love food travel and have been struggling to decide your next destination. Maybe you would like to take a sake brewery tour. Maybe you would like to drink sake fresh from the press. If you fall into one of these categories, CLICK HERE TO PLAN YOUR KYOTO TRIP and CLICK HERE TO BOOK KYOTO SAKE ADVENTURES.
Step 1: Rice Milling — Preparing the Foundation for Premium Sake
The journey begins with rice milling. The goal is to polish the grains, which improves flavor and aroma by removing the outer layers of rice. Many breweries do their own milling, while others contract it out.
.JPEG/:/cr=t:0%25,l:0%25,w:100%25,h:100%25/rs=w:1280 "Rice Milling Machine")
Here’s how rice polishing ratios work:
- Honjozo: Remove 30-40% of the rice’s outer layer, leaving roughly 60-70% of the heart of the grain.
- Ginjo and Junmai Ginjo: Polish away at least 40%, leaving 60% or less.
- Daiginjo and Junmai Daiginjo: Polish away at least 50%, leaving 50% or less.
Once milled, rice is stored for a couple of weeks. This resting period allows moisture to absorb evenly, which helps create consistent quality in the brewing process.
Tip: The more you polish the rice, the cleaner and more refined your sake tends to be.
Step 2: Washing, Soaking, and Steaming — Preparing the Rice
After resting, rice gets washed and soaked to prepare for steaming. These steps are crucial. Some brewers believe that controlling the washing time matters most. Soaking duration is equally important to let rice absorb water properly.
Washing can be automated with machines or done by hand.

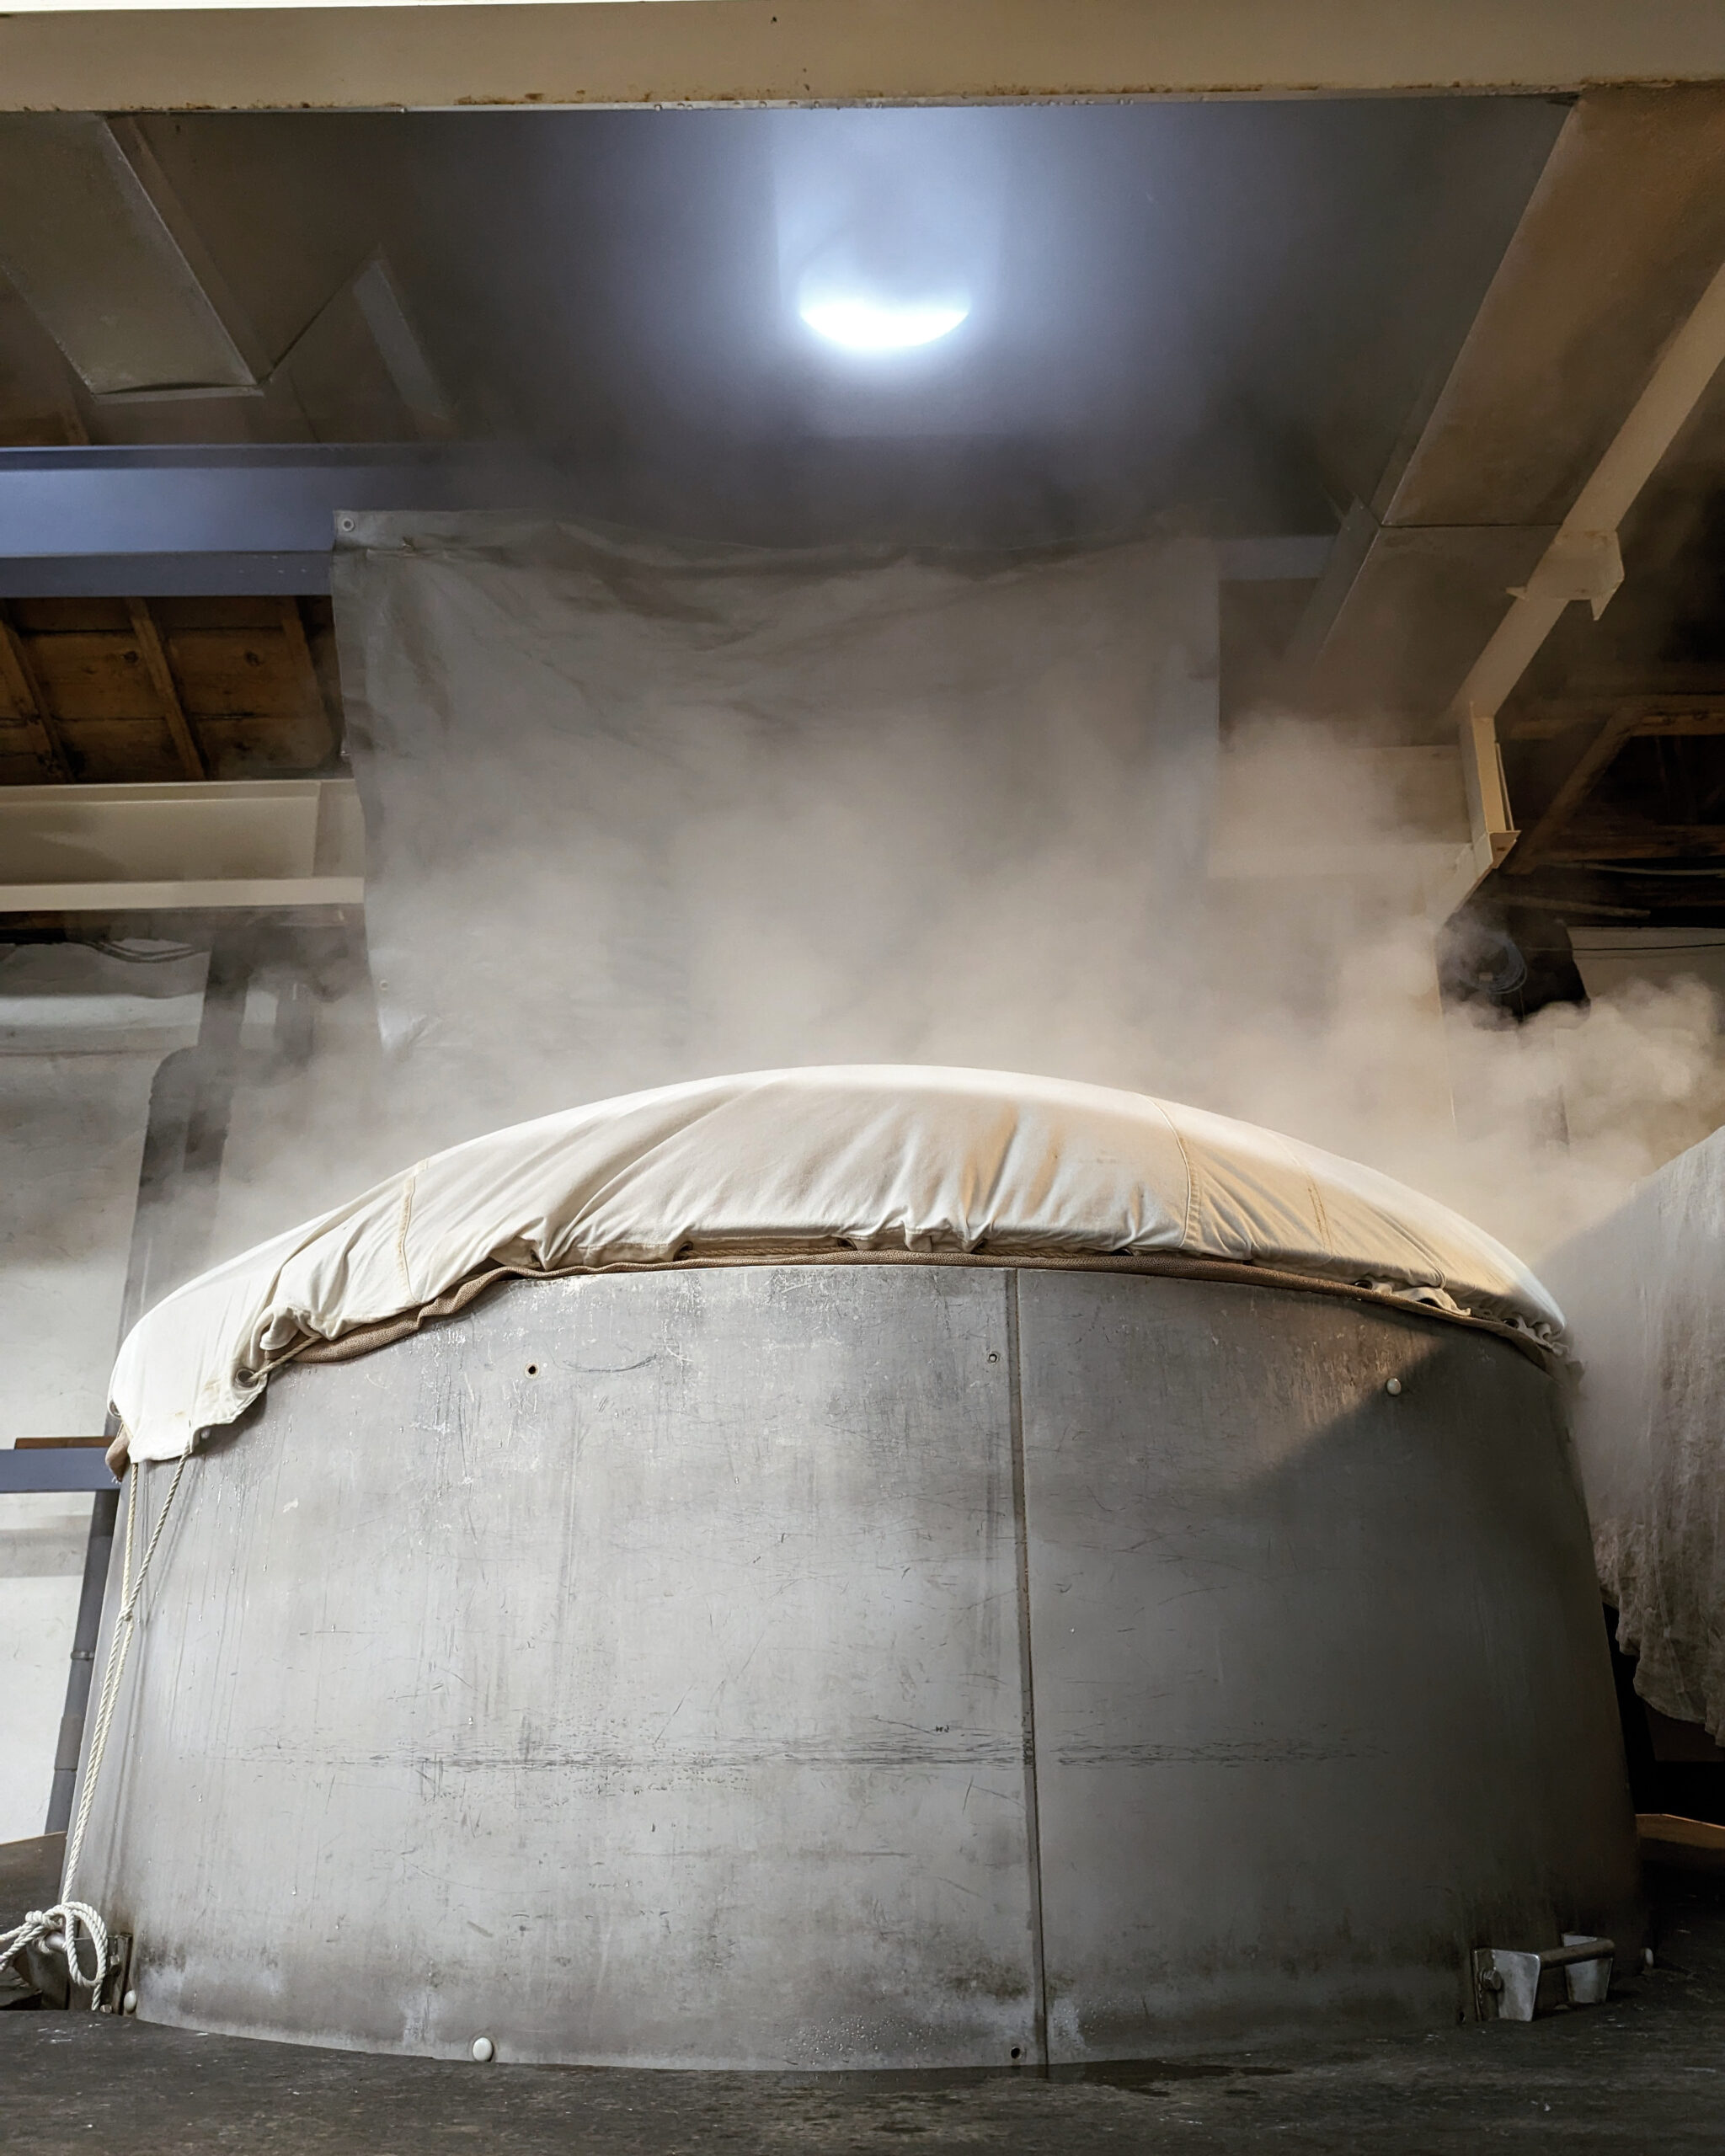
For steaming, large steamers are used—often quite big—because they need to handle tons of rice at once. Steaming must be done fresh, just before the rice is added to the next step.
Right after steaming, hot rice is cooled rapidly, sometimes by spreading it on fabric sheets in cool rooms. This quick cooling prevents overcooking and preserves the ideal texture.
.JPEG/:/cr=t:0%25,l:0%25,w:100%25,h:100%25/rs=w:1280 "Me, cooling rice")
Insight: Perfect steaming and cooling can make a big difference in how the rice particles absorb flavors later.
Step 3: Making Koji — The Enzymatic Converter
Koji is a special mold called aspergillus oryzae. Its job is to turn rice starch into fermentable sugar. Without it, yeast can’t produce alcohol.
Making Koji takes place in a temperature-controlled room called a Koji room, kept around 98°F with high humidity. Here, steamed rice gets sprinkled with Koji mold spores, creating a sticky mass called Koji. Over two days, the mold spreads and multiplies, turning the rice into a sweet, fragrant enzyme factory.
.JPEG/:/cr=t:0%25,l:0%25,w:100%25,h:100%25/rs=w:1280 "Koji table, Koji room")
Once properly grown, the Koji is separated into smaller portions and spread onto trays to develop further. Skilled brewers watch closely during this phase to ensure the mold grows perfectly, as it influences the flavor of the final sake.
Tip: Maintaining strict control of temperature and humidity at this stage is important for consistent Koji quality.
Step 4: Creating the Fermentation Starter (Shubo or Moto)
Next, the sake starter, called Shubo or Moto, begins to take shape. It’s like the yeast’s home base, where fermentation kicks off.
On day one, steamed rice, water, Koji, yeast, and sometimes lactic acid are mixed in a small tank. Over the next three days, more rice, koji, and water are added gradually to build up the mash. Each addition is carefully timed and measured.
.JPEG/:/cr=t:0%25,l:0%25,w:100%25,h:100%25/rs=w:1280 "Making the Moto")
By day 18, something called Odori or “the dance” happens—bubble activity signals fermentation is well underway. During this process, the yeast multiplies, working to convert sugars into alcohol.
Example: I once brewed sake at home. I didn’t realize I needed to release pressure during fermentation, and the bubbling caused the lid to blow off—messy but a funny lesson in pressure management!
Tip: Precision and patience during this stage build the foundation for a smooth, flavorful sake.
Step 5: Fermentation — The Heart of Making Sake
Fermentation lasts between 20 to 35 days, depending on the sake type. Regular temperature control is vital. Lower temperatures develop delicate flavors, especially for premium sake.
Some brewers add a small amount of brewing alcohol early on to boost aroma—this is common for non-Junmai sake, such as Honjozo. Junmai types do not add extra alcohol, focusing solely on rice, water, and Koji.

During fermentation, the mash—the Moromi— bubbles and develops complex flavors as yeast consumes sugars. It’s like watching a lively dance—each ingredient contributing to the final taste.

Example: Different brewers have varying techniques. Some prefer colder fermentation for a crisp taste, others opt for warmer temps for richer aroma.
Tip: The fermentation environment should be consistent—small changes in temperature influence flavor greatly.
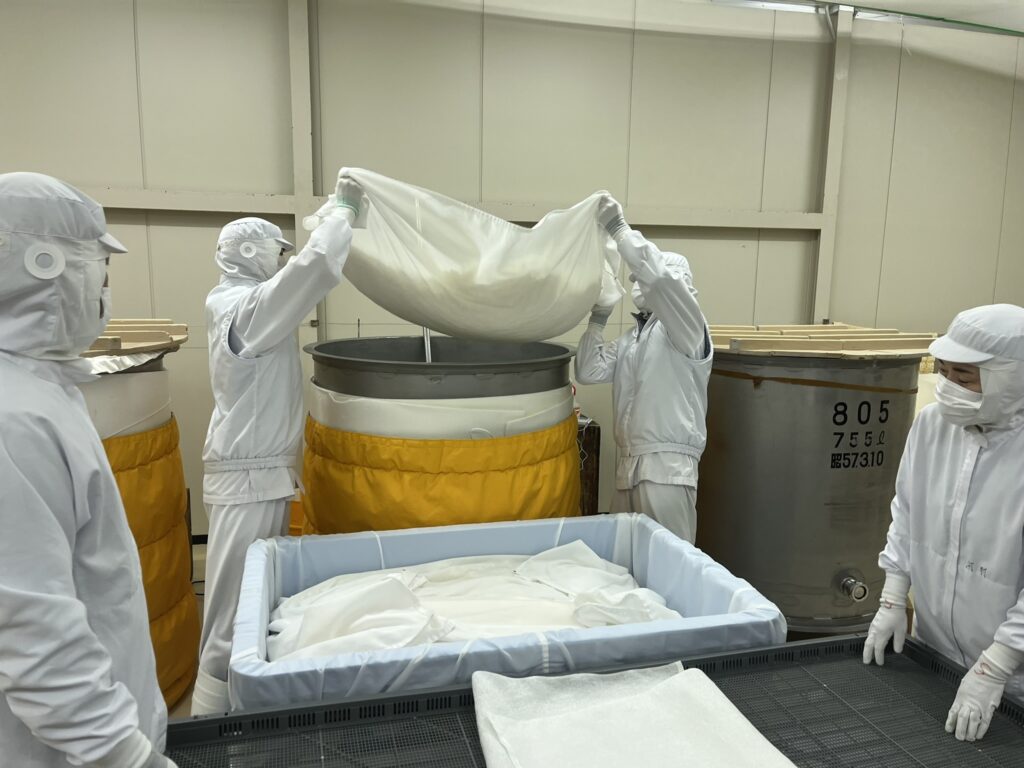
Step 6: Pressing — Extracting Clear Sake
Once fermentation wraps up, it’s time to press out the sake. This can be done in several ways:
- Yabuta: A hydraulic press applying steady pressure.
- Fune: Wooden boxes where sake is pressed in bags.
- Shizuku: A dripping process, letting sake flow out slowly without pressure.
The purpose is to separate clear sake from the leftover rice solids, called Kasu or sake lees. The freshly pressed sake is called Shiboritate.
.JPEG/:/cr=t:0%25,l:0%25,w:100%25,h:100%25/rs=w:1280 "Shiboritate fresh off the press")
Tip: Depending on how it’s pressed, sake can appear different—from crystal clear to slightly cloudy.
Step 7: Clarification and Filtration
After pressing, some breweries choose to settle sake sediments—Oribiki—by letting the sake rest. This clears out particles for a cleaner taste.
Filtering is another step—some use activated charcoal filters, others pass the sake through fine mesh to remove any remaining solids. If no filtering occurs, the sake is known as Muroka, meaning unfiltered.

Note: Many people confuse Nigori sake as unfiltered, but it’s actually cloudy because it’s only lightly filtered or filtered through coarser mesh. Sometimes, the cloudiness is added back into clear sake.
Tip: Filtered sake tends to be cleaner and more delicate, while cloudy (or Nigori) has a richer, creamier flavor.
Step 8: Pasteurization and Maturation
Most sake is pasteurized twice: just before storage and again before bottling. This process kills bacteria and stabilizes the sake. Some sake types, like Nama or Namazake, skip pasteurization for a fresher, livelier taste.

After pasteurization, sake is usually stored for about six months to develop its final flavor. Some breweries choose to mature sake in bottles, adding complexity and depth as time passes.
Insight: Unlike wine, most sake isn’t aged for years. Shelf life is shorter because sake doesn’t benefit from long aging, but some experimental breweries are trying aging methods for richer profiles.
Tip: The timing and method of pasteurization influence the sake’s stability and flavor.
Step 9: Dilution and Bottling

Finally, many breweries dilute sake with water to reduce alcohol content—unless they produce Genshu, which remains undiluted. This step balances and improves the flavor.
Once diluted and adjusted, sake is bottled. Sometimes, it’s pasteurized again right after bottling or stored for further maturation.
Conclusion
Brewing sake combines hundreds of years of tradition with modern techniques. From milling rice and cultivating Koji mold to fermentation and pressing—each step shapes the final drink. The process may seem complex, but it’s a reflection of Japanese care, patience, and craftsmanship.
Whether you prefer a light, fragrant Ginjo or a bold, full-bodied Futsu-shu (table) sake, understanding how sake is made helps you appreciate every sip. For enthusiasts, exploring different brewing processes offers a deeper connection to this historic beverage.
Ready to taste the craftsmanship? Stay curious, and next time you enjoy a cup of sake, remember the story behind each bottle.
Disclosure: As an Amazon Associate I earn from qualifying purchases. If you buy from a link on this site, I may earn a small commission from the vendor without any additional cost to you. No company pays me to say anything in particular, or to say nice things. I only stand behind products I believe in.
*10% Discount (one-time use)